buying guides
Spindle Sanders for Beginners: A Clear Buying Guide
Choose a first spindle sander by the simplest format that completes your first three real projects. A fixed table suits square curved edges, a tilting table is justified by a named bevel, and a belt-and-spindle combination is justified by recurring straight-edge work. More functions do not automatically make learning easier. Compare the exact sleeve system, package, support and setup instructions before deciding which adjustment process belongs in your first station.
As an Amazon Associate I earn from qualifying purchases. How affiliate links work.
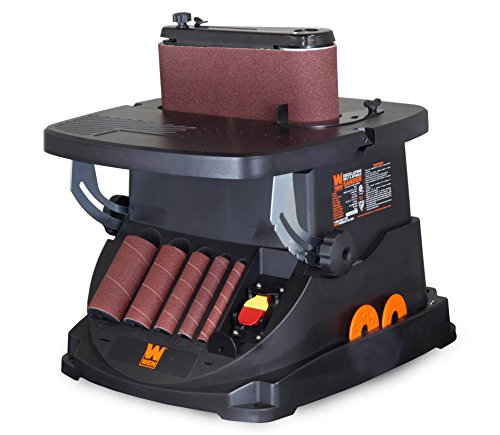
All three retained offers are exact WEN models used to illustrate fixed-table, tilting-table and belt-and-spindle formats. They are not ranked by price or hands-on testing; choose the simplest format that passes the documented project and setup requirements.
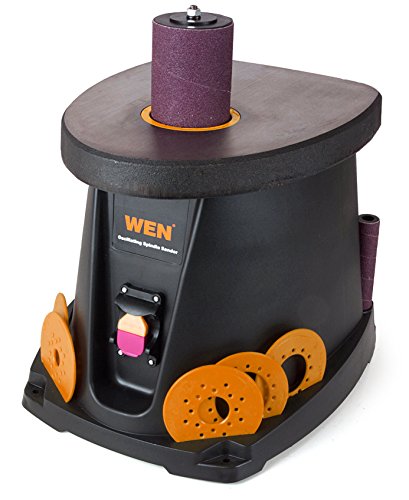 WEN 6510T 3.5 Amp Oscillating Spindle Sander,BlackCheck Amazon offer
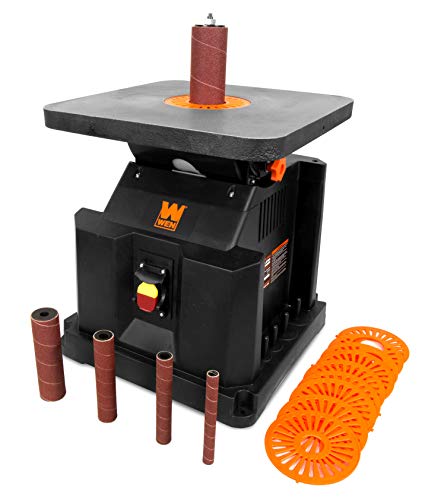 WEN AT6535 3.5-Amp Oscillating Spindle Sander with Extra Large Beveling Table TopCheck Amazon offer
Side-by-side buying comparison
| Model | Family | Sleeve height (in) | Diameters (in) | Belt size | Table tilt | Offer |
|---|---|---|---|---|---|---|
| WEN 6510T | spindle | Not confirmed | 0.5, 0.75, 1, 1.5, 2, 3 | None documented | 0° | Check Amazon offer |
| WEN AT6535 | spindle | Not confirmed | 0.5, 0.75, 1, 1.5, 2 | None documented | 45° | Check Amazon offer |
| WEN 6524 | combo | 4.5 | 0.5, 0.75, 1, 1.5, 2 | 4 x 24 in. | 45° | Check Amazon offer |
Check the model guides for regional variations and source qualifications. Table dimensions do not establish performance or material suitability.
Learn the job the spindle actually performs
The cylindrical abrasive contacts the edge of a workpiece supported on the table. That makes the tool useful for concave curves left by a bandsaw or scroll saw and for fairing other shaped edges. It does not turn a rough board into parallel thickness, and it does not automatically reproduce a template. The operator still controls the developing outline. Understanding this role prevents disappointment if your main sanding problem is a broad tabletop or if your project needs a machined joint rather than edge refinement.
Buy a setup process you can verify before checkout
Open the exact manual before purchase and locate mounting, sleeve changes, insert selection, table checks and dust extraction. For the documented WEN examples, the 6510T package uses six sleeves and five drums, the AT6535 uses five sleeves and four drums with ten throat plates, and the 6524 adds a 4-by-24-inch belt assembly. The smallest sleeve can mount directly, so a sleeve count is not a drum count. A readable setup is more useful than a large accessory number without an assembly explanation; do not assume generic hardware will safely fill a missing washer, insert or drum.
Choose the simplest format that passes the project test
Choose the fixed-table WEN 6510T path when square curved edges dominate and its documented 1/2- through 3-inch sleeve range covers the radii. Choose the AT6535 path only when a current project needs its 0-to-45-degree table; stop if the work needs the 6510T's three-inch diameter because the AT6535 stops at two inches. Choose the 6524 combination only when the 4-by-24-inch belt will handle recurring straight-edge work; stop if another tool already owns that job and changing modes adds storage rather than removing a station. These are format examples, not rankings by price or hands-on performance.
Price the first working station rather than the bare machine
Put the exact machine quote into the Setup Budget with delivery, secure support, the required dust connection and the first useful replacement sleeves and grits. Do not double-count parts already included, and do not assume the sample sleeves cover the finishing sequence. If the complete station no longer fits the budget, change format or defer an optional feature before removing a required insert, mounting provision or dust-control component.
Use stop rules before the feature list grows
Stop on a candidate if the required sleeve diameter or support arrangement is undocumented, the actual table cannot support the planned movement, or replacement abrasives are not identifiable for that exact system. Stop on a used machine when the model label, inserts, drums, washers or oscillation cannot be verified. Stop on a portable format when the work cannot be secured within the manufacturer's clamped arrangement. A more complicated machine is not a beginner upgrade when the relevant mode, support or replacement path remains unresolved.
Build a routine before building speed
Use the manufacturer's startup and shutdown sequence, maintain the specified table opening, and disconnect power before the adjustments that require it. Arrange extraction and appropriate protective equipment before sanding. Keep loose clothing, jewelry, and hands clear of moving parts. If the work cannot be supported or held within the manual's requirements, choose another method. A good first purchase supports an orderly routine: assemble the correct parts, check the setup, make controlled passes, inspect the work, and clean up after the machine stops.
After purchase, move to the spindle-sander setup guide and practice on a comfortably sized scrap rather than a tiny finished part. When shopping outside the US, carry the same selection checklist into the UK bobbin-sander guide or Australian spindle-sander guide so regional voltage, plugs, support and delivery stay attached to the actual offer.
Questions about Spindle Sanders for Beginners: A Clear Buying Guide
Is an oscillating spindle sander difficult to learn?
Its purpose is straightforward, but feed control and preserving the intended curve take practice. Read the exact manual and begin with a comfortably sized scrap piece rather than a small finished part.
What should my first sleeve assortment include?
Buy the sizes that match your projects and the exact length required by the machine. Add appropriate grits after checking availability, instead of purchasing the largest assortment by default.
Can I sand without connecting dust extraction?
Follow the machine manual and your shop dust-control requirements. Plan extraction as part of the station, since a visible pile of dust is not the only dust generated during sanding.