guides
Sanding Hardwood Curves with a Spindle Sander
A spindle sander can refine hardwood curves, but hardwood is not one predictable sanding condition. Species, grain direction, moisture, defects, and the cut left by the saw can change the result. Use a sound representative offcut to establish a workable process, then preserve the final part’s outline through controlled passes and inspection. For this curved-edge work, choose the speed, feed, and grit sequence allowed by the machine and suited to the stock; a broad-face finishing schedule may not suit the profile.
As an Amazon Associate I earn from qualifying purchases. How affiliate links work.
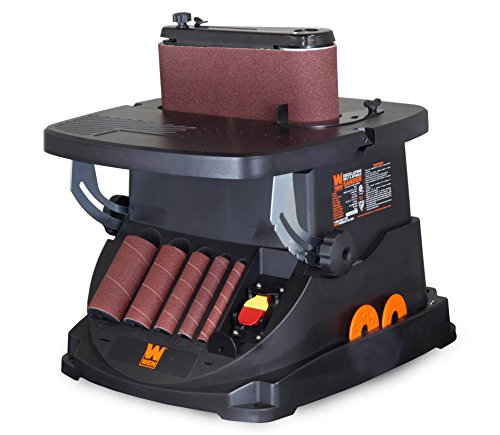 WEN 6524 Oscillating Belt and Spindle SanderCheck Amazon offer
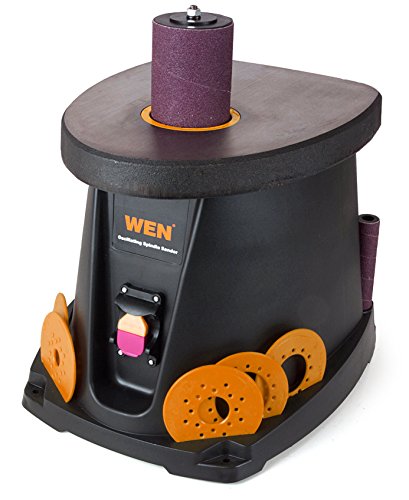 WEN 6510T 3.5 Amp Oscillating Spindle Sander,BlackCheck Amazon offer
Read the grain before sanding
Look at how the grain intersects the intended edge, especially where a curve approaches a thin tip or changes direction. A single component can present long grain, short grain, and end grain in close succession. Mark vulnerable areas during planning so they are not treated like the broadest, strongest part of the blank. Loose knots and cracks require assessment before machine contact. Inspect decorative grain just as carefully for weak short-grain areas, loose knots, and cracks. The material should be suitable for the part and the proposed handling method before any abrasive is selected.
Improve the cut rather than increasing pressure
Dense or difficult grain can make a rough edge slow to refine, but the amount of waste left by the saw is often a controllable variable. Prepare a consistent allowance outside the target profile using an appropriate cutting method. If one area contains a large bulge, remove it by a suitable rough-shaping step before final sanding where practical. Do not compensate for a poor cut by pressing heavily against a small sleeve. The aim is to make the sanding stage about gradual profile refinement instead of prolonged local stock removal that encourages heat and shape errors.
The G0739 manual gives a useful operating boundary without promising a result for any species: support the work on the table, hold it with both hands, guide it against spindle rotation and use light pressure rather than forcing it. Treat a need for sustained heavy pressure as a diagnostic signal. Recheck rough-cut allowance, sleeve condition, grit, local grain and whether this is still an edge-refinement task. Horsepower, hardness labels and oscillation do not establish a universal feed rate, thickness limit or finish quality for hardwood.
Separate three hardwood project decisions
For a shaped furniture rail, the priorities are continuous table support, preserving the reference face and blending changing grain without altering joinery. For a repeated template or pattern, outline accuracy matters more than erasing every isolated scratch by machine. For a short-grain decorative tip, support and breakage risk may rule out spindle contact even when the adjacent curve fits a sleeve. Decide which of those jobs the part is doing before selecting pressure or grit. When the same component contains all three, divide the work into machine-suitable and hand-finished regions rather than forcing one process across the full edge.
Choose the sleeve for access and control
The smallest concave radius determines which diameters can reach the profile. Within that constraint, consider how the chosen cylinder will contact the broader portions of the curve. A very small sleeve can create a localized hollow if the work dwells. A larger sleeve may give more manageable contact but cannot enter a tight transition. Plan multiple approved setups if necessary. Evaluate the grit on a matching offcut and inspect both removal and scratching. The correct choice is the one that advances the actual stage of work while leaving enough allowance for subsequent refinement.
Watch for loading and heat
Inspect the stopped abrasive when cutting performance changes. Resinous deposits, compacted dust, or a polished band can reduce effective cutting and lead to longer contact time. Respond by correcting abrasive condition or process rather than automatically pressing harder. Check the work for discoloration and compare it with the natural wood color. A defect that appears only at a tight curve may be tied to dwell or restricted movement. Recording where it occurs helps identify a cause. Avoid assuming that a different motor speed is available or appropriate unless the machine explicitly supports that adjustment.
Protect dimensions through the finishing stages
Once the shape is correct, every later abrasive stage still removes material. Inspect the curve and edge angle as carefully as the scratch pattern. A coarse scratch that reaches deeper than the remaining allowance may require a decision about the part rather than repeated sanding in one spot. Use raking light to reveal marks and compare the outline with its reference. For a mating component, test the intended fit. A surface that feels smooth can still contain a dimensional error, and a finish coat may emphasize rather than conceal uneven sanding.
Treat species information as part of preparation
Wood species can differ in their dust-related health effects; consult credible material guidance and use the required extraction and protective equipment. CCOHS provides a reference on wood-dust health effects, while the machine manual supplies the operating requirements. Do not infer that a familiar or pleasant-smelling species is harmless to sand. Keep the successful project notes specific: species or known stock, sleeve diameter, preparation method, and finishing sequence. That information helps repeat a good result while leaving room to reassess when the next board has different grain or condition.
Questions about Sanding Hardwood Curves with a Spindle Sander
Can a spindle sander handle hardwood?
It can handle suitable hardwood edges within the machine’s intended use and capacity. Results depend on the stock, preparation, abrasive, and control.
Why does one section sand differently?
A curved edge can expose changing grain orientation and density, while localized rough-cut allowance or abrasive loading can also affect removal.
Should hardwood always use a coarse sleeve?
No. Select abrasive for the amount of material remaining and the required finish, then test on representative scrap.